|
Beekeeping courses 2008
Promotions
2008
AN
INTRODUCTION TO BEE-KEEPING
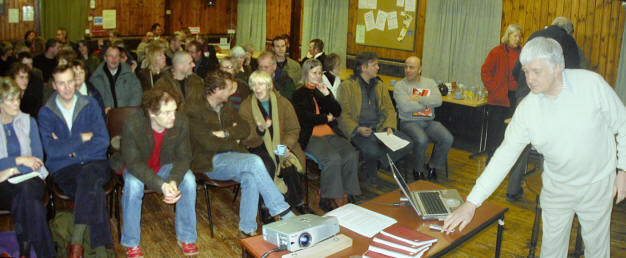
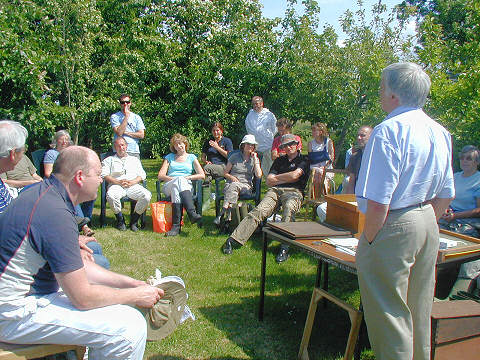
An enthusiastic audience
averaging over 60 people packed into the tiny Watchfield Hall for the
six evenings of 'Beginners Beekeeping' lectures.
Arranged by the Burnham
Division of the Somerset Beekeepers Assn. The classes were given by
Gerald Fisher, a long established Somerset beekeeper and tutor and President of the Somerset Beekeepers Assn.
and hosted by Michael and Christiane Hare and Thomas O'Neil.
|
 |
|
Part of the
audience during the break |
Following the
enthusiastic response to the Beginners lectures. Many visitors
wanted to expand on the beekeeping experience!
The Burnham Division arranged practical sessions
at members apiaries.
Obviously due to the
large numbers of visitors wishing to attend. The sessions will be
have to be limited and split into groups, in order to give each
student the opportunity to actually get close to the bees.
The overwhelming response has had an
effect on our earlier plans!
And we are busy arranging a new schedule of visits to members
apiaries!
"Watch this Space"

Contact:
Email
Webmaster and Associate member: J Rigarlsford.
here
or Tel: 01934 750274
|
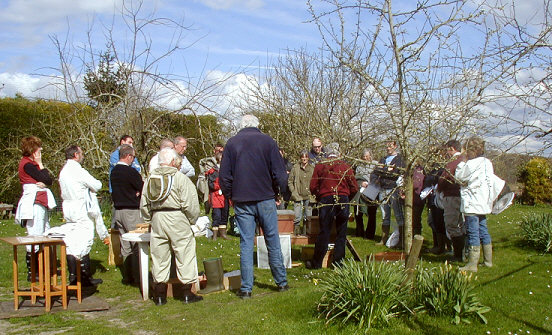
A swarm
of enthusiastic beekeepers attend the 1st practical
beekeeping session ! |
|
As a member on the beginners
course here is a brief report and summary of the tremendous
amount of practical advice and hands on tuition available
throughout this course! JR.
Our thanks must go to
Gerald Fisher and his selfless efforts in promoting
beekeeping and making these beginners sessions so
successful.
And also to the hosts of
these meetings for allowing us into their apiaries and for their hospitality
after! |
Following the huge success of the "Introduction to
beekeeping" lectures given at the Watchfield Hall by Gerald Fisher.
And arranged by
the Burnham Division of the Somerset Beekeepers Association.
Over 25 enthusiastic new and potential
beekeepers were welcomed to a members apiary on Saturday
5th April for their first practical hands on session.
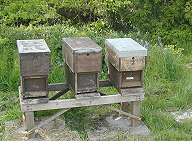
Gerald explained and
demonstrated the setting up of Hives and the How, when and
why of a beekeepers tools and equipment.
He also opened some hives and explained what to look for and
expect at this time of year.
Many questions were asked and ably answered by Gerald in his
usual easy, practical and humorous fashion! |
|
Practical Swarm Prevention and Control. |
|
 |
The second
practical lecture in the Introduction to Beekeeping series
was to be called "Swarm Prevention and Control"!
Bees dont read the book and in the event,
'Swarm Prevention' was abandoned! but fortunately
for us, It turned into a bonus demonstration of Swarm
re-homeing!
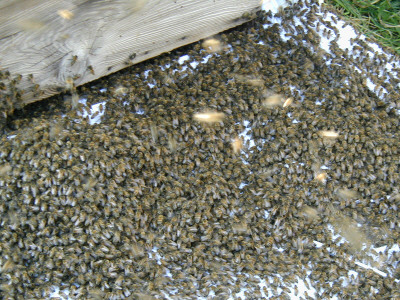
The very morning before the
demo at Michael and Christiane's apiary. While mowing the
grass, David --also one of the students on the course --
spotted a massive swarm which had come from the hive (shown
left)
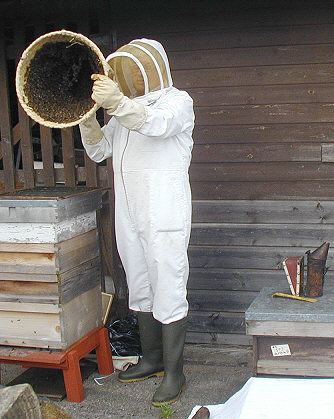
The bees were quickly shaken
into a large straw basket skep and placed upside down and
left for the remaining flying bees to join their queen.
During the lecture, The swarm
was collected and tipped onto a prepared sheet covered ramp.
Where following their natural instinct to move upwards they
soon followed the queen into their new home! (below left)
~~~~~~~~~~~~~~~~
On inspection of the really
strong colony that produced the swarm, Gerald suggested that
one of the reasons for the swarm, was sheer numbers! Even
though the colony was on a brood and a half!
Large numbers of brood cells
and several new queen cells were found, indicating that the
colony was ripe to swarm.
The remaining bees would hatch one of these new queen cells and continue the
colony. |
|
 |
|
Using the strength of the swarm and other strong colonies,
Gerald also demonstrated how to create new colonies using a Nuc' (Nucleus box). In fact three new colonies were born
that day! |
 |
Marking a
queen and 'The June Gap'?
|
At
the Practical Beekeeping course on the 24th
May with Gerald Fisher, new members were given a couple of
further examples of how bees do not read the programme!
One of the parts of the days
demonstration was intended to explain and demonstrate, how
to deal with the term 'The June Gap'
Briefly, it is a short period from the end of May into June
when colonies are at full strength but forage can be scarce
between the early willow and fruit tree blossom etc and the
later main blossoming of garden flowers or arable main
crops.
In some circumstances, strong colonies can die of
starvation! So it is vital that we check that the bees have
built up enough stores to see them through this period or
provide them with syrup to keep the colony going.
So just to prove everyone
wrong, the hives that we inspected were packed with honey
and surrounded by fields of clover and
rapeseed blossom!
|
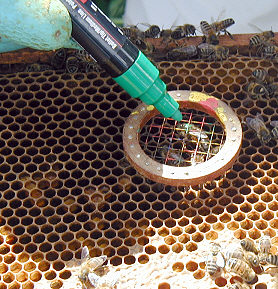
Marking the queen on the
thorax.
To give an indication of the age of the queen, some
beekeepers use a different coloured marker for each
year.
'Beesafe' markers from a reputable
equipment supplier should be used, as 'Tippex' and
other paints can be very toxic to your queen! |
Marking the Queen.
Well
we would have, if we had found one!
To ensure survival of the colony, it is important that the queen can be
easily recognised and is present at each inspection.
The nucleus colonies that were taken at the previous
meeting, proved to be really strong. Which indicated
that the brood cells given to the nuc's had all
hatched really well and the queen cells that had
obviously produced a queen.
Even with more than twenty pairs of eyes looking, we
could not spot the emerged virgin queens!
The
opinion was that because the emerged queens were so
young, they could have been outside on their mating
flight?
|
|
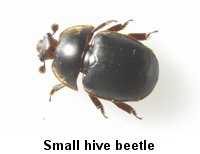
Pests and
diseases.
| |
|
 |
At the June session of the 'Practical Beekeeping' course.
Members were introduced and shown examples of some of
the more common pests and diseases of bees. And how to deal
with them. We were
informed on the Notifiable diseases. Which must be reported
to the local bee inspectorate. The main ones we are likely
to see are:
- AFB American Foul Brood
- EFB European Foul Brood
- Small Hive Beetle.
(Recently infections of Varroa mite have
been removed from this list).
Some examples of
foul Brood disease and mites etc are shown below |
| |
|

 |
|
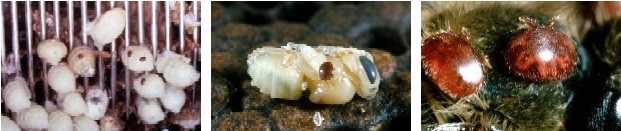
Varroa mites, tend to infest the grubs of
drone bees, where the egg has longer to develop. |
|
The Varroa mite
is serious problem at the moment.
It is believed by some
beekeepers to be a factor in the latest bee problem known as
'Colony Collapse' where whole hives of worker bees can
virtually disappear in days! One theory is that a bad
infestation of varroa mites will weaken the bees resistance
to other viruses etc. And in some circumstances, the bees
become too weak to return to the hive!
Since
it was first found in Devon in 1992, the Varroa mite is now
widespread throughout the country! Heavy infestations
can weaken the bees, making colonies prone to other viral
infections etc. The Varroa mite has become resistant to some
earlier treatments.
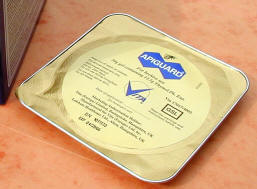
Gerald showed and described various ways of testing and
dealing with this pest . These included using 'Integrated
controls' where, in addition to using the latest chemical
treatments such a Apiguard, bees were also kept on open
floors that allowed up to 25% of the mites to drop through
to the ground where they could not re-infest other bees. |
|
'Wax
Moth'!
We were also
shown examples of damage to frames and foundation by the
dreaded 'Wax Moth'!
As
can be seen here. the wax moth larva can devour comb,
foundation and even wooden frames in days! And even burrow into the hive
structure itself, leaving huge tunnels up to 5-6mm dia.!
The waxmoth tends to lay in
gaps and dark spaces where her eggs can lay undetected.
Especially in equipment in store. Gerald recommended regular
inspection of unused hives and equipment and scorching where
possible with a blowlamp. Another means of disposing of the
waxmoth and its larva, is by sealing brood and super boxes
along with their frames in a bin bag and placing the whole
thing in the freezer for a couple of days!
Prevention methods against many other
pests were dealt
with, such as preventing raiding by wasps, using mouse guards to prevent mice from overwintering
in your hives and securing your hives against Badgers, Cattle. and
brainless vandals! etc. |
Wax Moth
Damage!
Gerald allowed
us a quick look at some live waxmoth damage before slamming
the lid back on the box!
A couple of small white
Wax moth larvae can be seen in the centre of this frame! |
The Honey Harvest
|
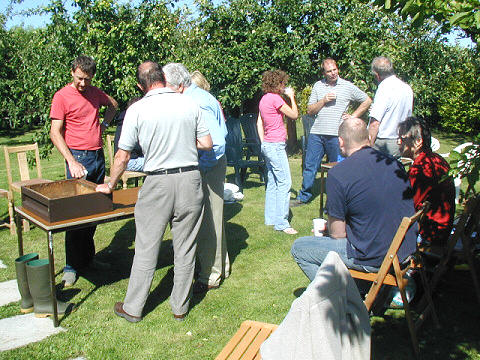
Some of the members talking
'Bees' during the break! |
At the July session of the 'Practical Beekeeping' course.
Gerald Fisher talked and demonstrated on how we should prepare
for the 'Honey Harvest'.
Generally, the honey is taken off in late August as soon the
foraging season begins to decline. This is to allow the bees
time to build up their winter stores after the honey is taken
off. However, Gerald told us that, with the increased use
of 'Apiguard' for Varroa control the harvesting may need to be brought
forward slightly. This is because, Apiguard is a gel that gives of a
vapour that depends on a temperature of over 15.C. to work
efficiently.
(Honey from bees that were working rapeseed crops would have
been taken much earlier, because of is tendency to solidify in
the comb if left too long). |
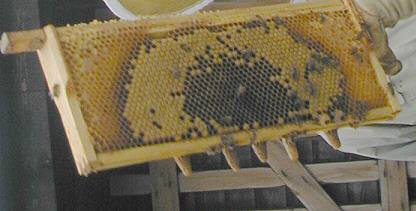
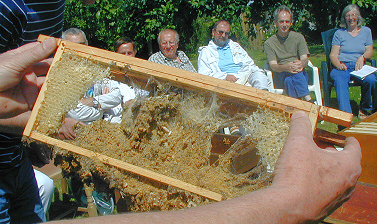
The honey is ready
for extracting when the majority of the comb has been capped as
seen here. This means that the bees have removed the excess
moisture and it is ready to be stored.
Gerald advised against taking honey from partially capped
frames. If honey from uncapped cells dripped from the comb when
held on its side, this means the bees had not completely removed
the excess moisture and could lead to fermentation of the honey
after it was extracted and in store! |

An ideal frame of capped honey
ready for extraction! |
|
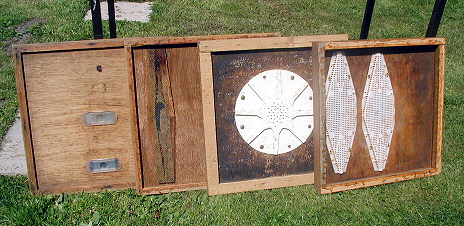
A selection of 'Clearer' boards. |
We were shown a selection of
types of 'Clearer boards'
One of these is placed beneath the honey filled supers to clear
most of the bees before the frames are removed for extraction.
The clearers are attached to the underside of the feed hole of a
spare crown board and work like a one way bee valve! Once the
bees leave the supers and go down through the hole, they are
forced to find their way out via a funnel shape tunnel from
which they cannot find the way back.
|
Gerald gave us his
views on the merits of the various types of clearers. He felt
the Porter bee escape (above left) was useful for clearing a
small number of bees. He was not too keen on the two types shown
(centre above) for quickly clearing a large number of bees, as
they have a tendency to clog. And you could end up with dead
bees that were difficult to remove.
His favourite was the rhomboid escape (far right) which could
clear a large number of bees fairly quickly. And were easily
removed enabling the board to be used as a crown board again.
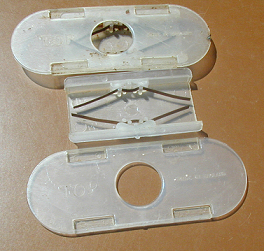
Close up, of
Porter bee escapes is shown (right. One with the top removed).
As can be seen, the bees pass easily through the one way light
springs, but find it difficult to return! |
 |
|
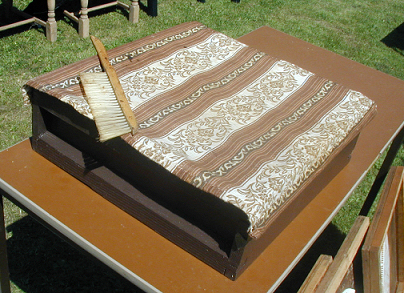 |
A couple of other useful items to
have when removing the frames to be extracted were: A cover of
fairly heavy material weighted with a couple of lengths of dowel
or broom handle. And a soft brush or goose feather for removing the odd bees
still on the honey frames.
The cover is draped over a spare
super which holds the frames selected for extracting.
This helps to avoid robbing by nearby bees while you are
collecting more honey frames! |
|
|
Extracting and marketing your honey
|
 |
Following on from the
previous meeting, Gerald talked about timing the extracting of
the honey and aspects of marketing your product etc.
Due to the Varroa mite becoming
resistant to the older Bavarol treatment, A new improved product
called Apiguard is now in use. However this treatment is in the
form of a gel which only vapourises above 15'C. It can also taint the
honey.
Which means the honey has to be taken off slightly earlier for
treatment to begin, by
about the end of August, allowing up to 6 weeks while the
weather is still warm enough for the bees to be treated with Apiguard and before the bees go into the
winter. |
Gerald emphasised the
importance of hygiene and presentation when selling your produce
to the public. And also correct labelling etc.
We were also advised to find a 'Beeproof' room to work in and
cover the floor with newspapers to avoid divorce proceedings
arising from a sticky floor!
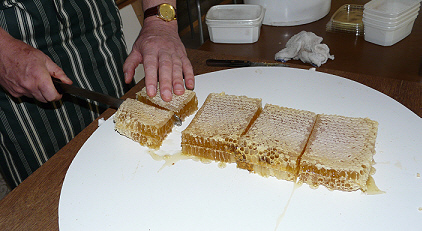
He demonstrated how to produce cut comb or chunk honey using
clean
unwired foundation in clean frames. |
 |
|
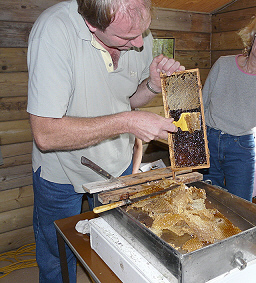
Thomas
here demonstrates his preferred uncapping fork! |
We were shown how to
uncap the frames of honey with an uncapping knife over an
uncapping tray. The wax
cappings are allowed to remain in the tray for any residual
honey to drain. Which can then be fed back to the bees.
The remaining wax is put through a
heated wax separator and can be made into candles etc. or even
exchanged for new foundation! |
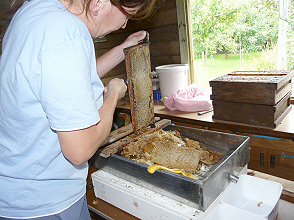
We all got down and dirty and had
a go at decapping honey and no fingers were lost! |
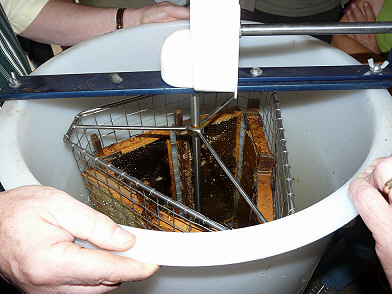
After decapping, the
honey frames are placed in a honey extractor or spinner.
The extractor shown here is what is known as a tangential
extractor. Where the frames are placed and spun sideways on.
(There is also a radial extractor where the frames are placed
from the centre out like the spokes of a wheel).
We got to take our turn on the handle while the honey was thrown
out of one side of the comb, the frames are then turned over to
spin out the other side.
The extracted honey is then strained several times before
finally being bottled and labelled. |
 |
 |
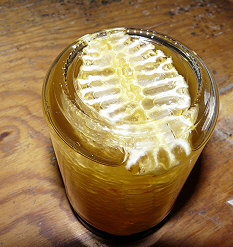 |
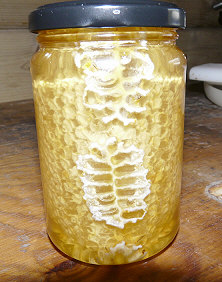
Finally
could this be a new way of marketing honey?
Michael Duckett
brought this unusual jar of comb honey for us to see.
He had placed a jar
upside down over the hole in the crownboard. And the bees
actually built and sealed a honeycomb right in the jar!
He tells us he is
training his bees to put the lid on and label the jars! |
|

